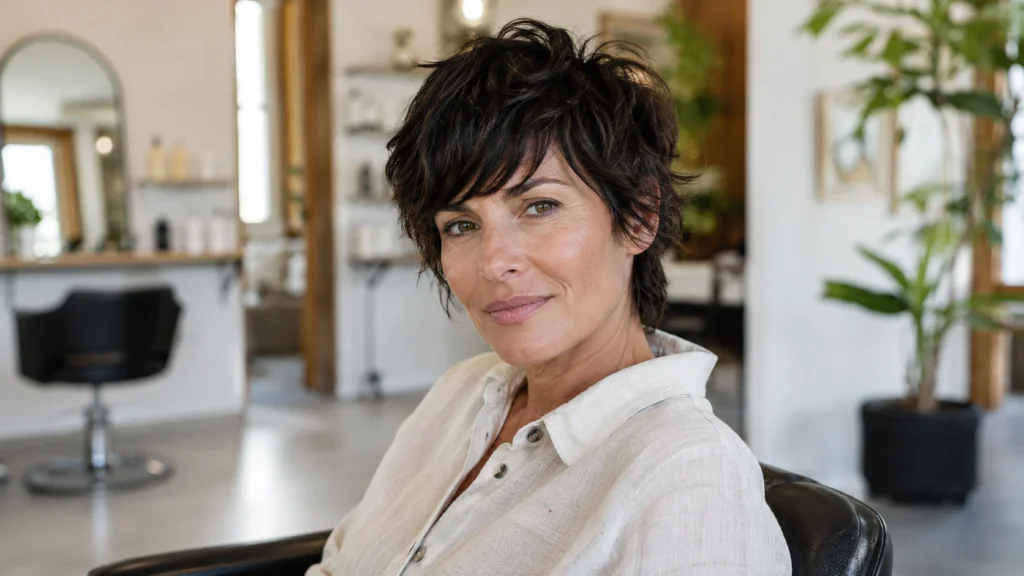
Shag pixie hairstyles thin fine hair can be a game-changer when your roots look amazing at nine in the morning but completely defeated by noon. If you’ve ever caught your reflection in an elevator mirror wondering where your volume went, I promise you’re not alone. I’ve had clients cry actual happy tears in my chair after years of pancake-flat roots, all because we finally cut with their hair instead of against it. A shag pixie might sound intimidating, but it can be one of the lowest-effort, highest-reward haircuts you’ll ever try. Stick with me, and I’ll show you exactly which version can work for your face shape, styling routine, and real life.
My Styling Notes
I’ll never forget the client who moved from Chicago to Charleston and called me in a full panic six weeks after her cut. I’d given her the prettiest razored shag pixie, all soft piecey ends, and it looked incredible in my dry Midwest studio. Then Southern humidity got hold of it and those same ends just clung together and went stringy by nine a.m. We hopped on a video call, and I talked her through swapping her cream for a lightweight texture spray and asking her new stylist for a slightly blunter finish instead of that razored edge. My biggest takeaway from that whole ordeal? The “perfect” pixie isn’t universal. It has to be cut for your hair, your climate, and your actual morning, not just what looks good in photos.
23 Effortless Shag Pixie Secrets to Instantly Elevate Fine, Thin Hair
1. Fine Hair vs Thin Hair: Why the Difference Actually Matters
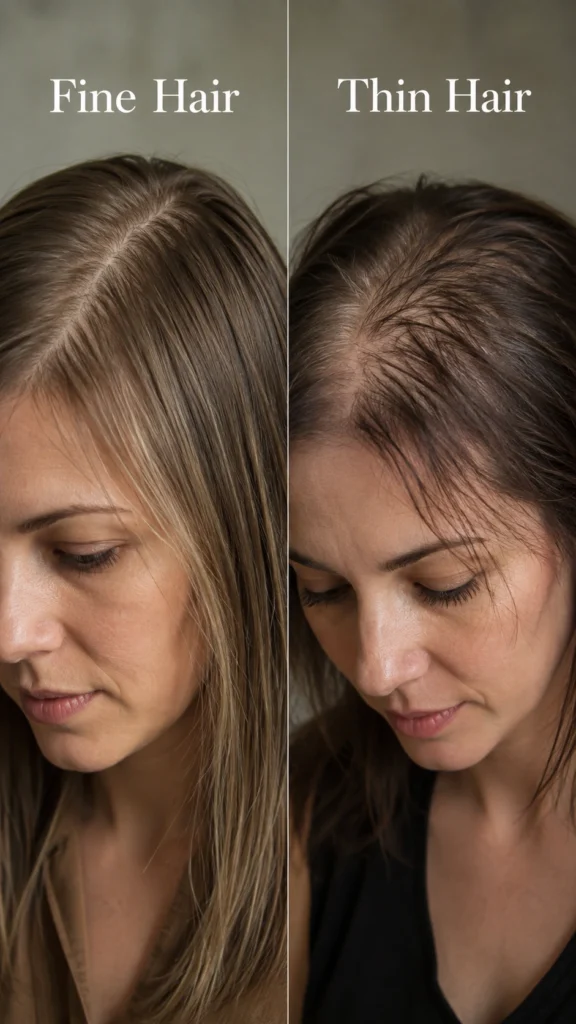
Almost every client who sits in my chair says the same thing when they point at their roots. “My hair is so thin.” Half the time what they actually mean is fine, and the other half they mean thin, and those are two completely different problems that need two completely different haircuts. Fine hair is about the width of each individual strand, so even a full head of it can feel flimsy and flat. Thin hair is about density, meaning fewer strands per square inch, which is a scalp visibility issue more than a texture one. You can absolutely have both, and honestly most of my fine haired clients do have some density loss too, especially after 40. Knowing which one you’re dealing with changes everything about how your stylist should be cutting your layers, especially when choosing the right haircuts for thin, fine hair.
2. Why a Shag Pixie Is the Secret Weapon for Fine, Thin Hair
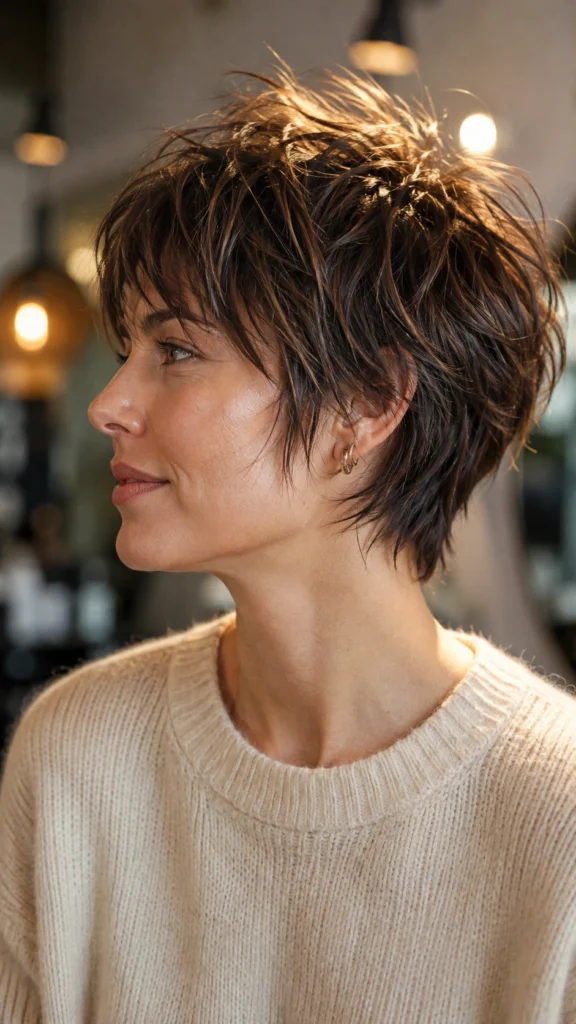
Here’s the thing nobody explains well. A shag pixie works because it’s cutting against gravity instead of with it. Short layers stacked close to the scalp create lift right where you need it most, and the choppy, uneven ends trick the eye into seeing more hair than is actually there. I always tell my clients that fine hair loves shorter layers because long, heavy ends just pull straight down and flatten everything on top. A few things this cut does really well:
- Builds volume at the crown without a single drop of product
- Removes the “helmet head” look that longer layers create on fine hair
- Gives you texture that looks intentional even on a lazy day
It’s honestly one of the only cuts I recommend where less hair genuinely reads as more.
3. The Exact Words to Use With Your Stylist
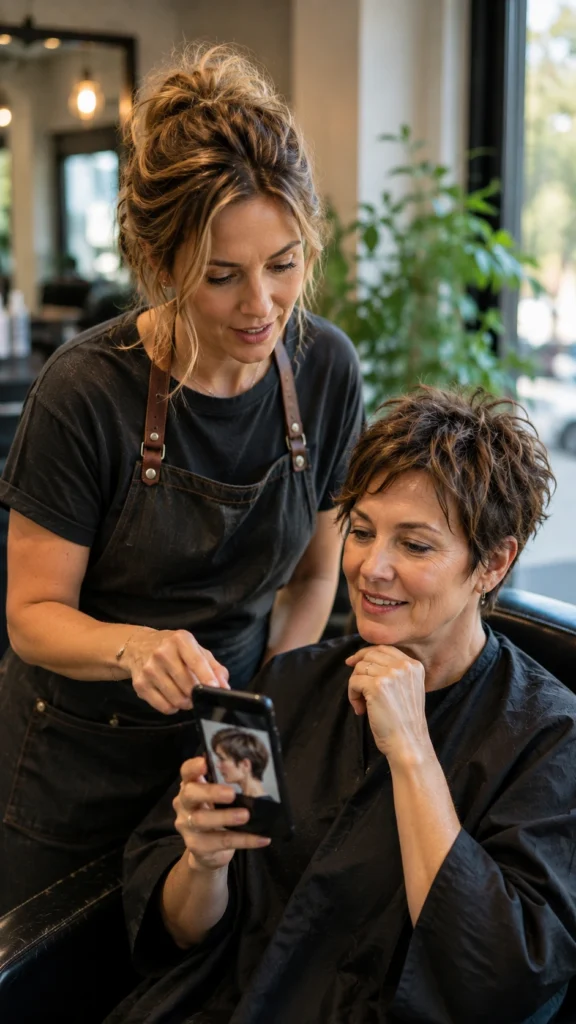
This is the part that trips people up the most, and I get it, salon vocabulary can feel like a foreign language. If you walk in and just say “shaggy,” you might end up with a cut that’s too thinned out for your density. What you actually want to ask for is point cutting or texturizing shears used sparingly, paired with shorter layers concentrated at the crown and temples. Be very clear that you have fine or thin hair, because a stylist who doesn’t know that might reach for a razor a little too enthusiastically. One thing I always tell my clients before a consultation is to bring a photo and say the words “keep some weight at the ends,” since that single sentence saves so many fine haired clients from an overly wispy result they didn’t ask for.
4. Curtain Bangs Shag Pixie
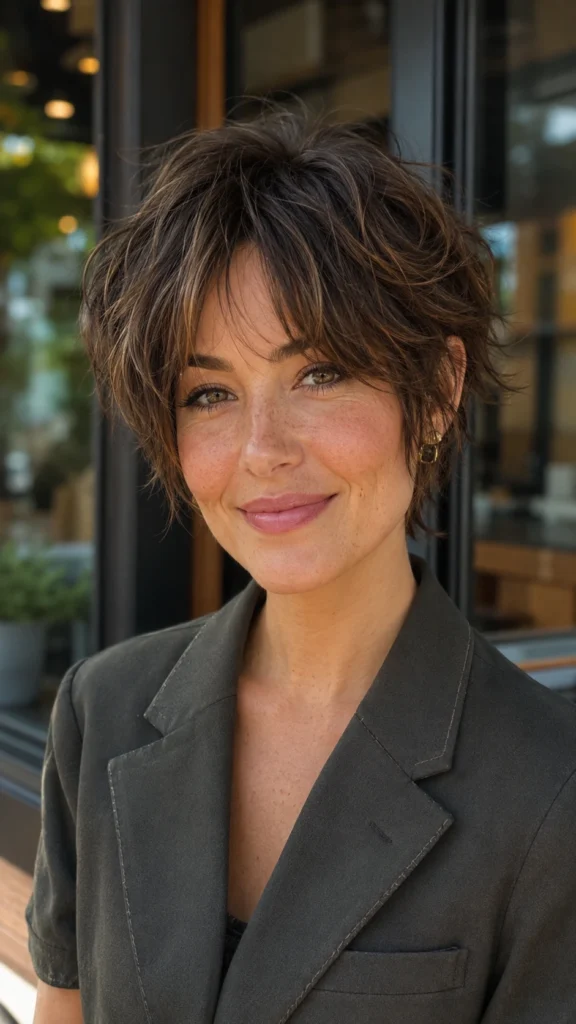
Curtain bangs on a shag pixie are romantic, a little retro, and shockingly forgiving on almost every face shape. They part naturally down the middle and sweep out on both sides, which softens strong features and adds movement right where your face needs it most. My favorite part is how low maintenance they actually are once they’re grown in a bit, since they sort of style themselves with a round brush and a blast of warm air. This combo is especially pretty on wavy or slightly textured fine hair because the bend does half the work for you.
5. Side Swept Bangs Shag Pixie
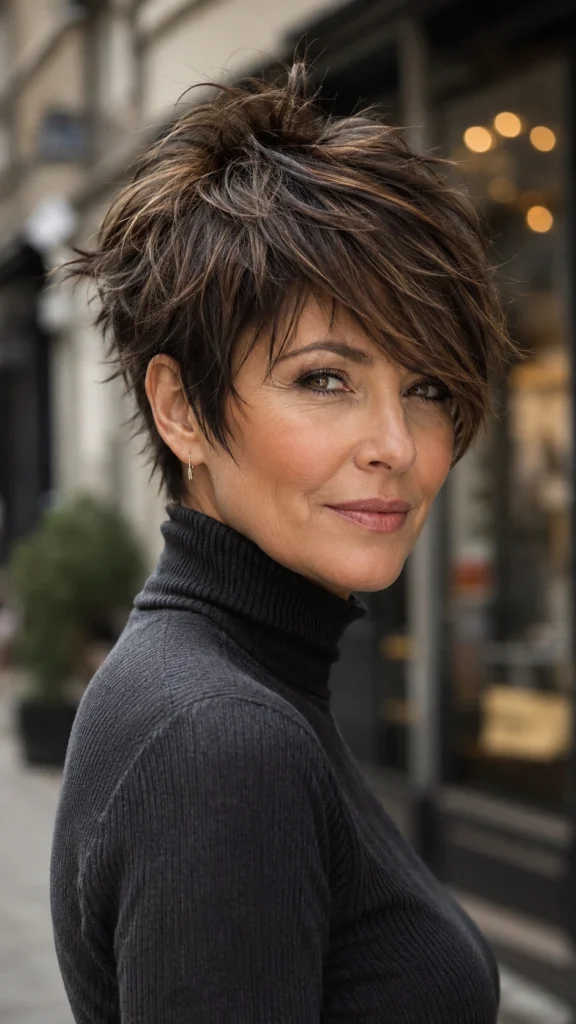
Side swept bangs are the move if you want something a little more polished than curtain bangs but still full of movement. They angle across the forehead and blend right into the shaggy layers, so there’s no harsh line, just a soft, swoopy frame around your eyes. I love this option for clients with a longer face shape, since the diagonal sweep visually shortens things in the best way. It also grows out gracefully, which matters a lot when you’re trying to stretch time between appointments.
6. Micro Bangs Shag Pixie
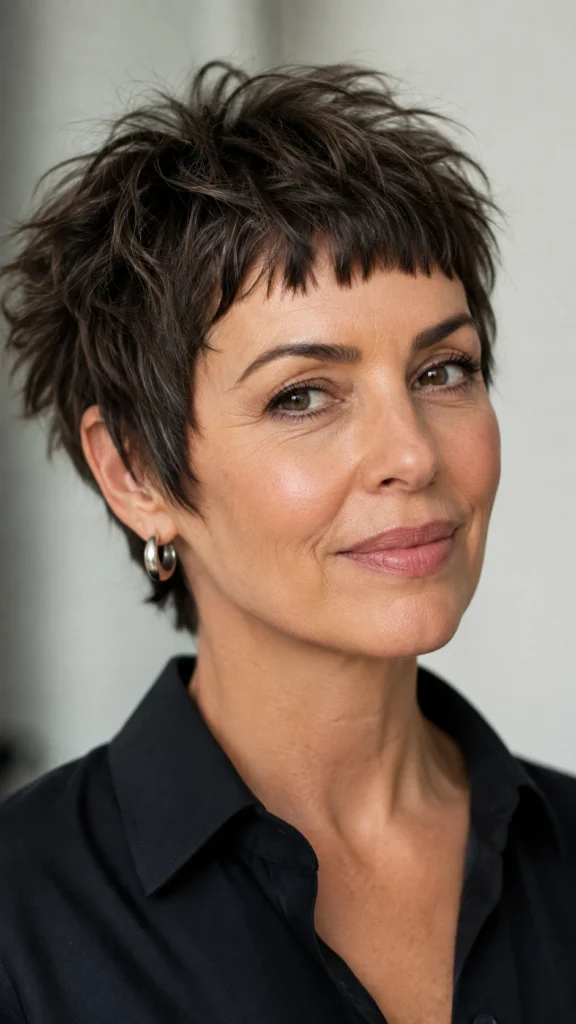
Micro bangs are not for the faint of heart, and I say that with so much love. They sit high on the forehead, usually just above the brow, and they demand confidence more than they demand a specific hair type. On fine hair though, they’re actually a genius volume trick because that short, blunt piece of hair naturally stands away from the skin instead of lying flat. A few things worth knowing before you commit:
- They need trimming every two to three weeks to keep their shape
- They work best with an oval, heart, or square face shape
- Humid climates can make them frizz faster than longer bangs
If you’re someone who wants a look that gets noticed the second you walk into a room, this is it.
7. No Bangs Textured Shag Pixie

Sometimes the most flattering choice is skipping bangs altogether and letting the layers do all the talking. This version relies entirely on choppy texture and movement throughout, with everything pushed slightly off center for softness. It’s the lowest maintenance of all the bang options since you’re not fighting forehead sweat or growing out an awkward line. I find this style suits clients who want something a little more polished for work but still want that lived in, piecey quality on weekends.
8. Color Techniques That Fake Volume
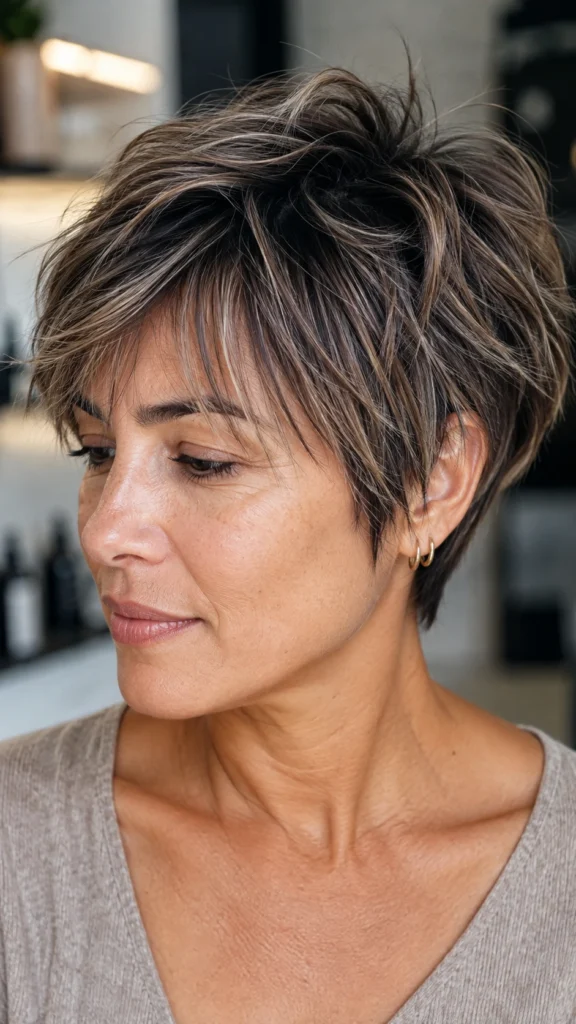
Color is honestly one of the most underused tools for making fine hair look thicker, and I wish more people asked me about it before their cut appointment instead of after.”A root smudge creates depth that tricks the eye into seeing more hair than what’s really there. Combined with techniques like gray blending for older women, low-contrast tones add dimension without the harsh regrowth lines that chunkier highlights leave behind.” One thing worth being honest about, fine hair is more porous, so it processes color faster and can also show damage faster, which means a good colorist will use gentler formulas and check your strands more often during processing. I always tell clients that subtlety wins here, since anything too high contrast can actually flatten your style by drawing the eye to the color instead of the movement in the cut.
9. Choppy Layered Shag Pixie for Extra Texture
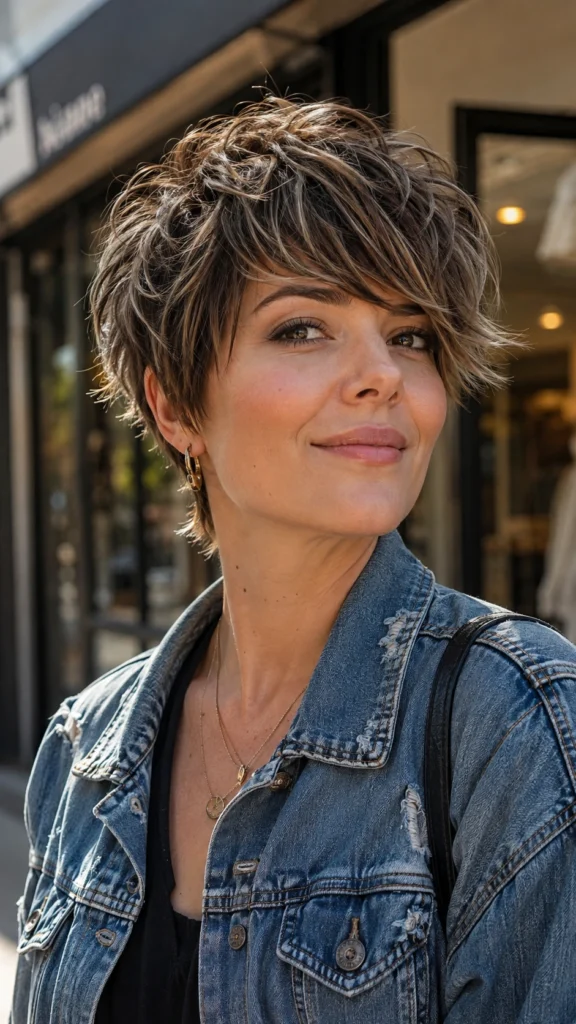
This version leans hard into texture, with layers cut at sharp, uneven angles all over the head instead of just at the ends. It’s a little edgier than a classic shag, and I tend to recommend it for clients who already have some natural wave or a bit of grit in their hair since the texture just amplifies what’s already there. On completely straight, silky fine hair it can look a touch too piecey without the help of a texturizing spray, so keep that in mind before you ask for it.
10. Messy Tousled Shag Pixie
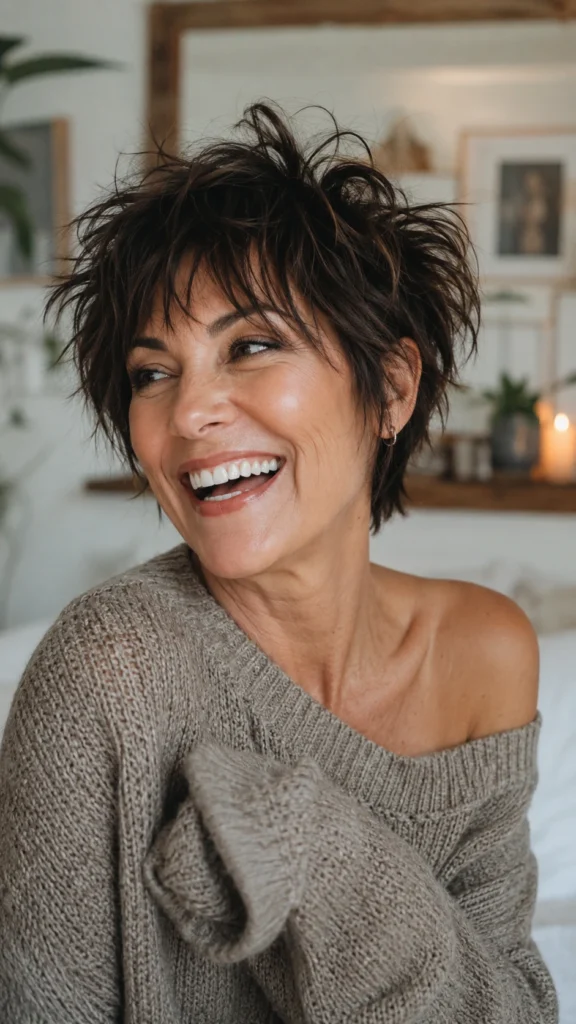
This one is basically the “I woke up like this” cut, except it takes some very intentional layering to pull off convincingly. The layers are cut with movement in mind, so the whole style has this relaxed, undone energy even right after you’ve styled it. My favorite thing about this option is how forgiving it is for busy mornings, since a little dishevelment is actually the goal here instead of something to fix. A few reasons this one works so well for fine hair:
- The uneven layers create shadow and depth instead of flat shine
- It hides regrowth and root shadow beautifully between color appointments
- It genuinely looks better with dry shampoo texture than freshly washed hair
Which one of these shag pixies do you think you’d try first?
11. Long Shaggy Pixie for a Softer Transition
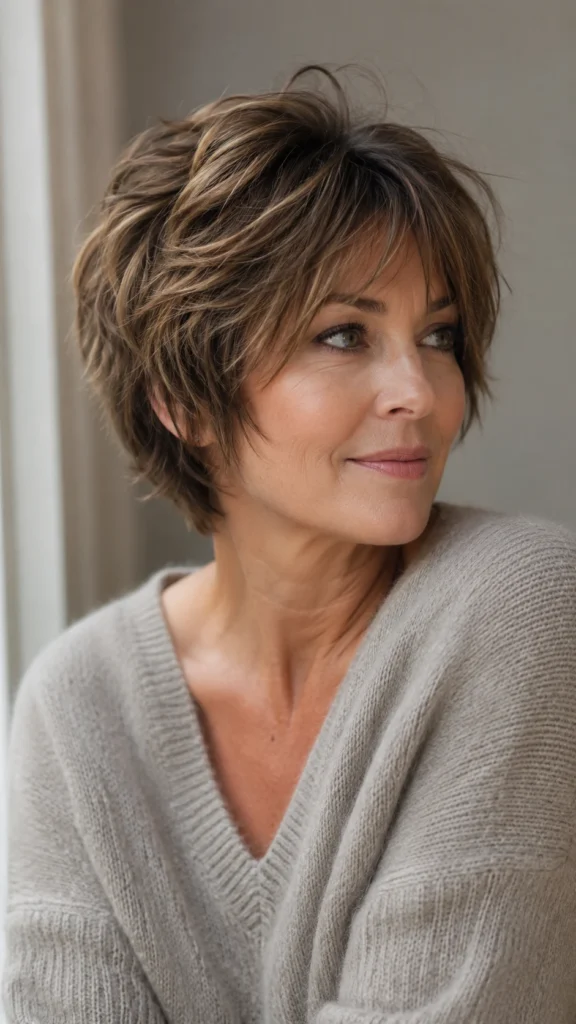
If you’re nervous about going short, this is the gentlest way in. It keeps a bit more length around the crown and sides while still incorporating shaggy layers throughout, so it reads more like an elevated pixie bob than a drastic chop. I love recommending this to clients who are coming from long hair and want a stepping stone rather than jumping straight into something super cropped. It also gives you more styling versatility day to day, since you can tuck it behind your ears or add a little wave depending on your mood.
12. Short Shag Pixie for Maximum Volume
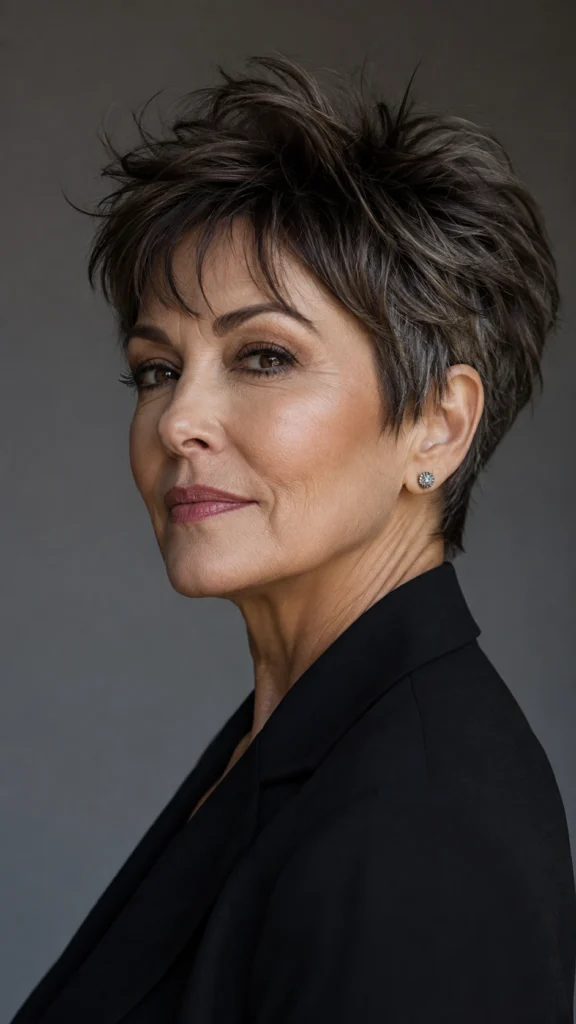
This is the boldest option on the list, and it’s genuinely the best choice if volume is your number one priority. The shorter the layers sit against the scalp, the more lift they naturally create, which is basically physics working in your favor for once. I will say this cut requires the most confidence and the most frequent trims, usually every four to five weeks, because growth shows up fast when there’s this little length to begin with. For clients who commit to it though, the payoff is huge, since it genuinely photographs and feels fuller than most fine haired clients ever expect from their own hair.
Tell me, which look is your favorite out of these and why?
13. The Real Maintenance Schedule You Need
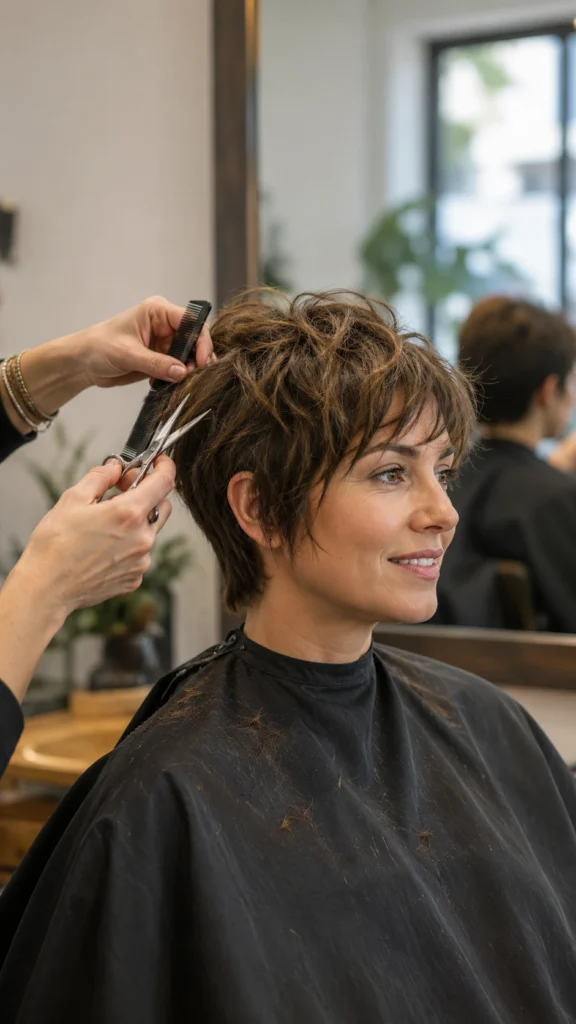
Let’s be honest about upkeep, because this is the part most galleries conveniently skip. A shag pixie on fine hair needs a trim every four to six weeks, and if you’re wearing one of the shorter or micro bang versions, you’re closer to that four week mark. Skipping appointments doesn’t just mean it grows out, it means the layers start losing their shape entirely and the volume you loved starts collapsing back into flatness. One thing I always tell clients booking their first pixie is to put the next appointment on the calendar before they even leave the salon, since fine hair pixies are notoriously easy to let slip past their prime.
14. What This Cut Actually Costs in the US
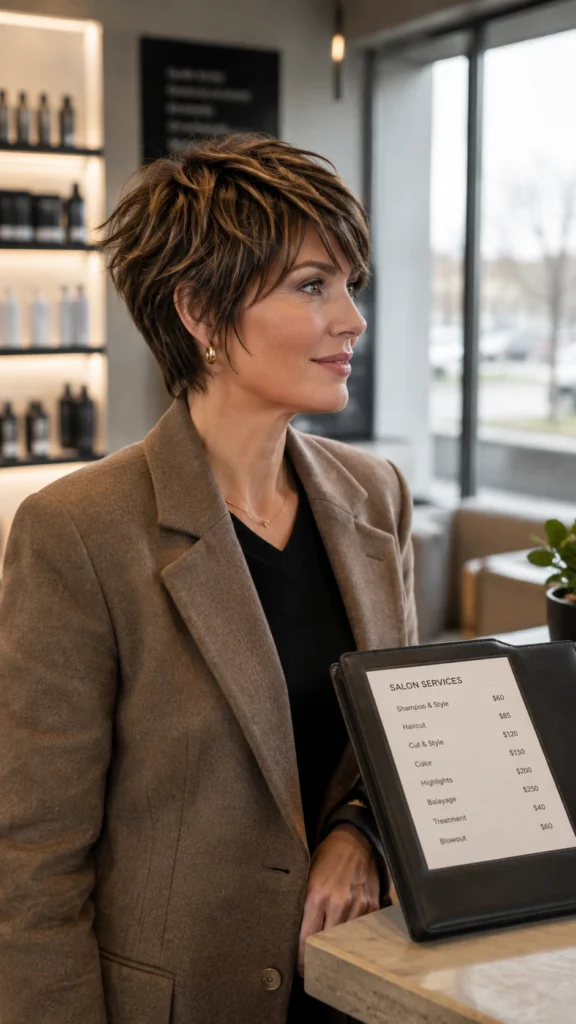
Pricing varies a lot depending on where you live, and nobody talks about this enough. In a smaller town or suburban salon, you’re typically looking at forty to seventy dollars for a cut, while a specialized stylist in a city like New York, LA, or Chicago can run you eighty to a hundred fifty dollars or more, especially if color is involved. A few cost factors worth knowing:
- Color services like babylights or a root smudge often double your appointment cost
- Booking with a senior stylist versus a junior one can change pricing significantly
- Frequent trims add up fast, so factor that into your yearly beauty budget, not just the first cut
I always tell new clients that a great pixie cutter is worth paying a little more for, since a bad cut on short hair is much harder to hide than a bad cut on long hair.
15. Budget Smart Alternatives Between Salon Visits
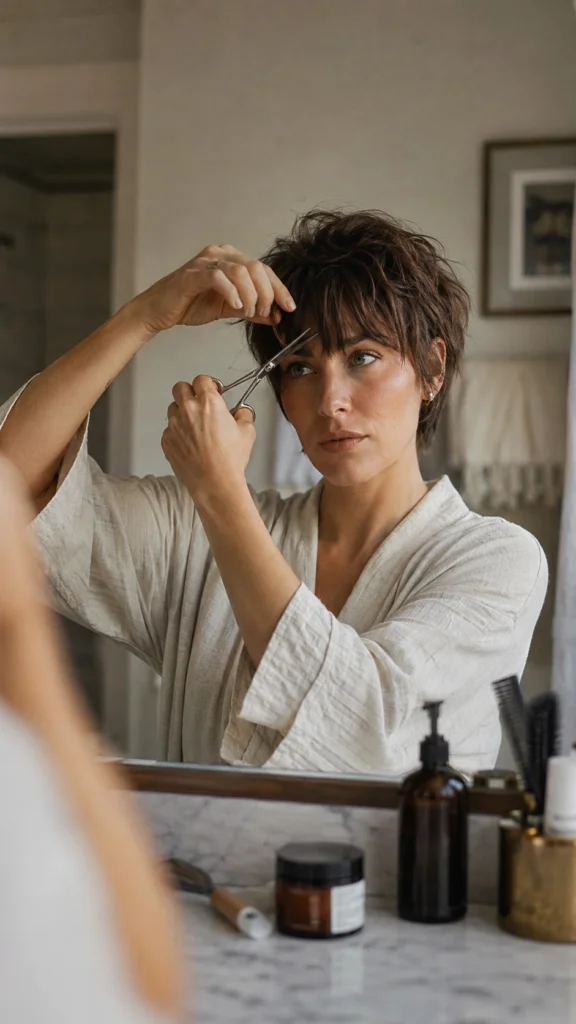
You don’t have to spend a fortune to keep this cut looking fresh between appointments. A pair of small, sharp hair shears from the drugstore can help you dust your own bangs if they’re growing into your eyes, just do tiny snips and stop before you think you’re done. Dry shampoo and a good texture spray genuinely extend your style life more than any pricey treatment will, and both usually run under fifteen dollars. My rule of thumb is to splurge on the cut itself and save on the daily products, since technique matters more than what’s in the bottle.
16. The Five Minute Morning Routine
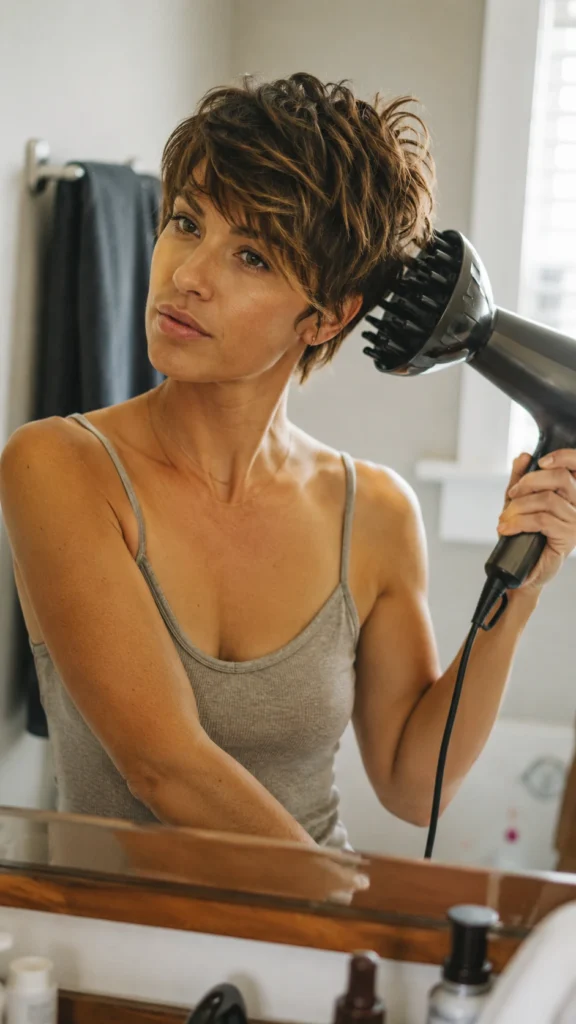
This is honestly my favorite part of recommending this cut, because it truly can be this fast. Start with slightly damp hair, apply a dime sized amount of lightweight mousse focused at the roots, then flip your head upside down and blast it with a hair diffuser or your dryer on a low, cool setting for about ninety seconds. Flip back up, finger comb the top layers into place, and finish with a texture spray or a little pomade on just the tips for definition. That’s genuinely it, no round brush, no complicated technique, just five minutes and you’re out the door looking like you tried way harder than you actually did.
17. Products That Help vs Products That Kill Volume
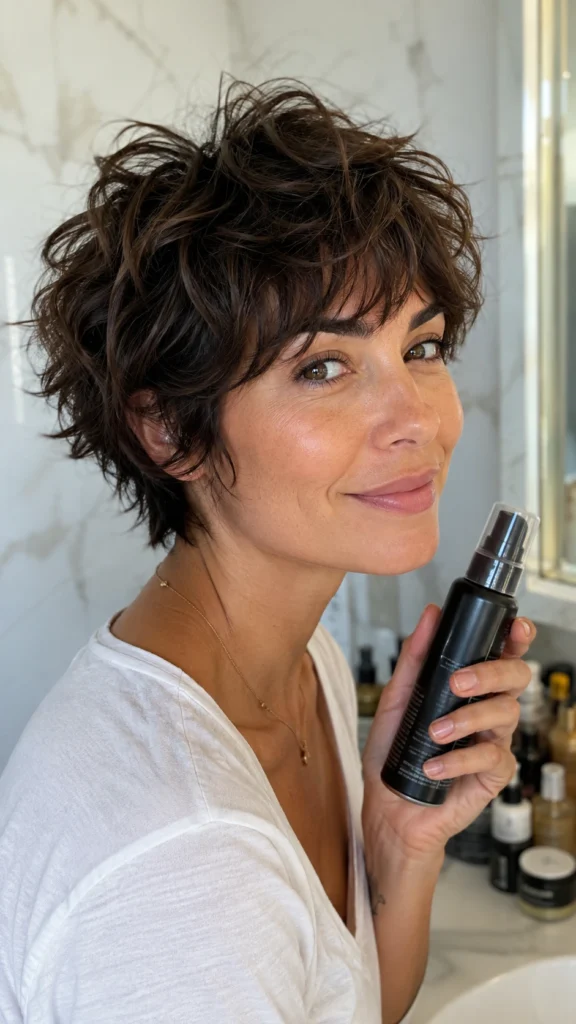
This is where I see the most well meaning mistakes happen. Heavy creams, thick pomades, and rich leave in conditioners are all designed for hair that needs to be weighed down and calmed, which is the exact opposite of what fine hair needs. What actually works is anything labeled lightweight, volumizing, or texturizing, since those formulas are built to add grip and lift without adding weight. A root lifting mousse applied to damp hair is probably the single most useful product a fine haired client can own. If you take away nothing else from this section, just remember that if a product feels rich and luxurious in your hand, it’s probably going to feel flat and sad on your head.
18. Climate Proofing Your Pixie Region by Region

Where you live genuinely changes how this cut behaves, and I learned that lesson the hard way with my Charleston client. In humid climates like the South or coastal areas, skip the heavy creams entirely and reach for an anti humidity spray before you even start styling, since moisture in the air will find any excuse to make fine hair frizz or fall flat. In dry climates like the Southwest, static becomes the real enemy, so a tiny bit of leave in serum on your palms smoothed over the surface can calm flyaways without weighing things down. Cold winters in the Northeast bring their own version of static from hats and scarves, so I always tell clients there to carry a small anti static spray or even a dryer sheet in their bag for quick touch ups. And if you’re somewhere with big seasonal swings, don’t be surprised if your styling routine needs to shift a little from summer to winter, that’s completely normal and not a sign you’re doing anything wrong.
19. Sleep and Second Day Styling Tricks

Protecting your texture overnight makes a bigger difference than most people realize. Sleeping on a silk or satin pillowcase reduces the friction that flattens fine hair while you sleep, and it’s a genuinely easy swap that costs very little. A few other tricks worth trying:
- Loosely clip your bangs or top layers away from your face before bed to keep their shape
- Spritz a little texture spray on dry roots in the morning instead of washing again
- Use a diffuser on low heat for just a minute to revive volume without a full restyle
Second day hair on a shag pixie often looks even better than day one, since the layers settle into a slightly more relaxed, piecey shape once the freshly cut sharpness softens a touch.
20. Mistakes That Make Fine Hair Look Thinner
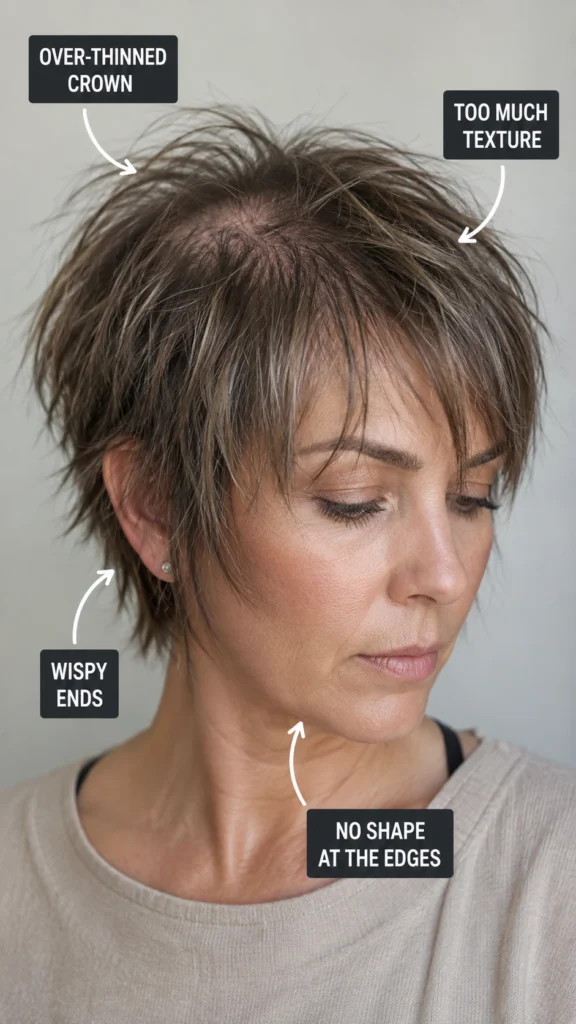
I’ve seen every version of this go wrong, and it usually comes down to the same handful of mistakes. Over layering is the biggest one, where a stylist removes so much weight throughout that there’s nothing left to create the illusion of density, leaving you with wispy, see through ends instead of fullness. Over razoring is a close second, since razors are wonderful in small doses but disastrous when overused on fine hair, leaving strands thin and prone to splitting. Choosing bangs that are too heavy or too blunt can also backfire, since a thick, solid line of bangs actually draws attention to how sparse the rest of your hair is by comparison. My advice is always to trust a stylist who asks a lot of questions about your hair type before they start cutting, rather than one who just starts snipping the second you sit down.
Which part of your daily routine feels like it needs the biggest change right now?
21. Who Should Think Twice About This Cut
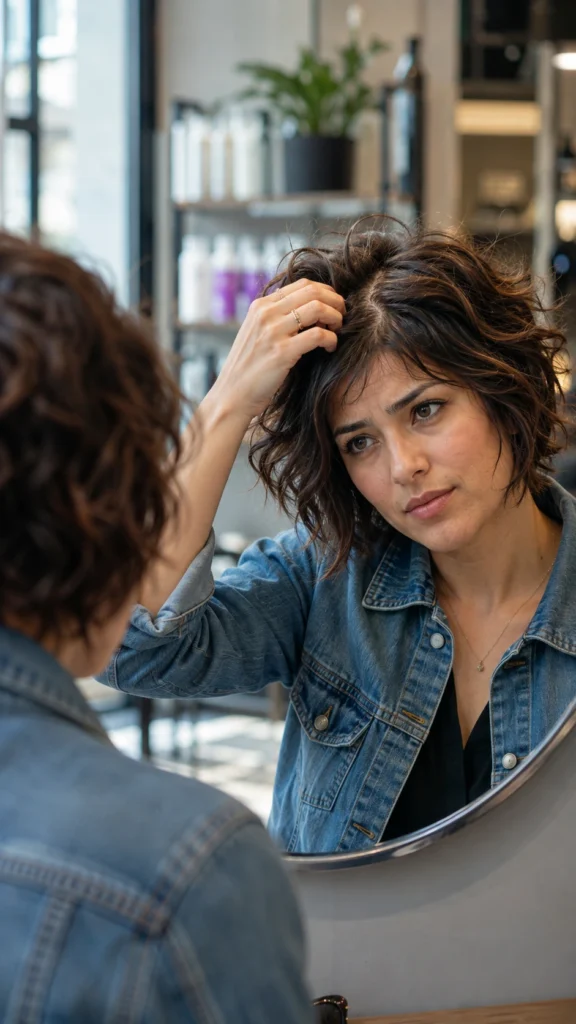
I always believe in giving the full picture, so let’s talk honestly about who this cut might not be perfect for.If you have a very strong cowlick, especially at the crown or hairline, a shag pixie can be trickier to manage since short layers have less weight to hold them down against the natural growth angle of the hair follicle.Clients with significant scalp visibility anxiety sometimes feel more exposed with shorter styles, even though the layering technically helps, so it’s worth having an honest conversation with your stylist about styling for coverage first. And if you have very tight, coily curl patterns, the cut can shrink up significantly shorter than expected once it dries, so going in with realistic length expectations matters a lot here. None of these are hard no’s, they’re just things worth talking through with your stylist before you commit to the chop.
22. Styling This Cut Confidently at Every Age
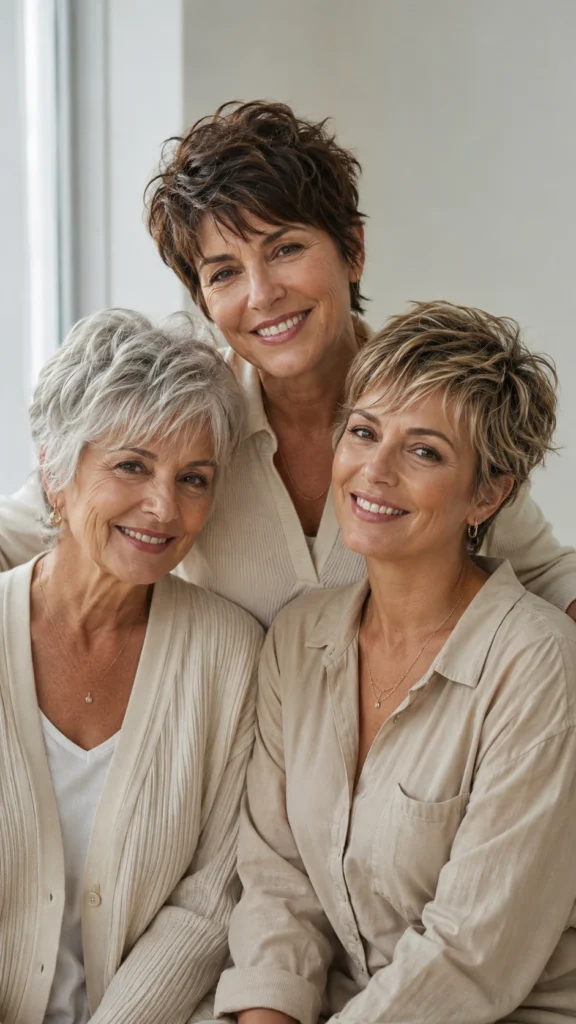
This cut genuinely works across decades, but the styling priorities shift a little as you go. In your thirties, you can play more with bold color and razored texture since your hair typically still has good elasticity to handle it. By your fifties, I usually steer clients toward slightly softer, less razored ends and more root lift, since hair often becomes a touch more porous and prone to breakage around this time. Over sixty, the focus tends to shift almost entirely to volume and ease, favoring shorter layers concentrated at the crown with minimal daily styling effort required. Age is really just a guideline here though, since I’ve had thirty year olds who wanted the low maintenance sixty plus approach and sixty five year olds who wanted every bit of edge a razor cut can offer.
23. Your Grow Out Plan
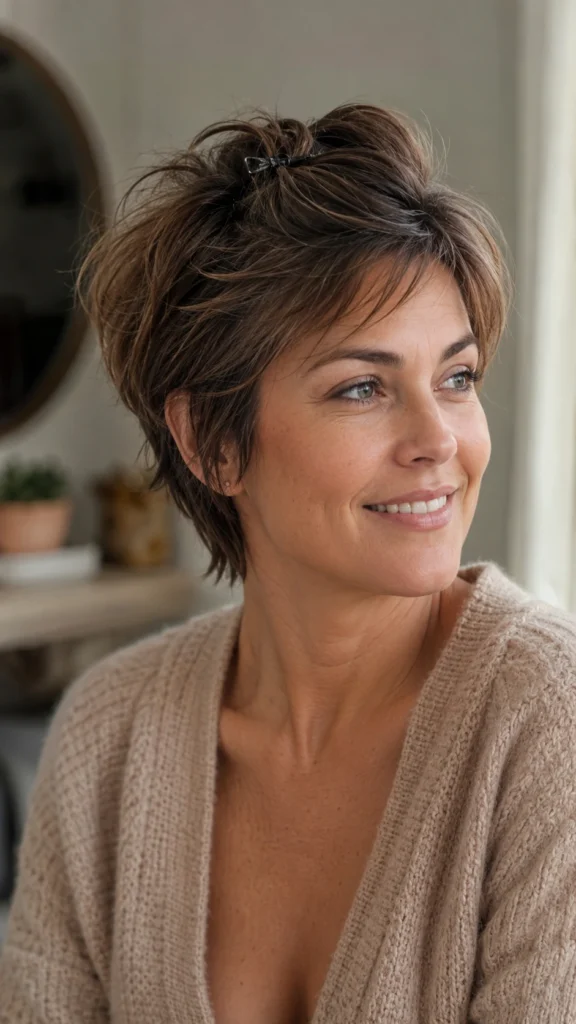
Growing out a shag pixie doesn’t have to mean an awkward, shapeless few months if you plan for it. The key is scheduling shaping trims every four to six weeks even while you’re growing it out, just asking your stylist to blend the length rather than maintain the short silhouette, which keeps things looking intentional the whole way through. Pinning back the top sections or adding a few clips can help bridge the trickiest middle stage where it’s too long to be short and too short to be long.
Top 6 Shag Pixie Hairstyles Thin Fine Hair
| Look / Item | Estimated Price | Care Level | Where to Buy |
|---|---|---|---|
| Curtain Bangs Shag Pixie (root lift mousse) | under 15 dollars | Medium | Amazon |
| Micro Bangs Shag Pixie (texture spray) | under 20 dollars | High | Amazon |
| No Bangs Textured Shag Pixie (matte texture paste) | under 18 dollars | Low | Amazon |
| Choppy Layered Shag Pixie (sea salt spray) | under 12 dollars | Medium | Amazon |
| Messy Tousled Shag Pixie (dry shampoo) | under 10 dollars | Low | Amazon |
| Short Shag Pixie (volumizing dry wax) | under 22 dollars | High | Amazon |
Your 30 Second Pixie Picker
By Budget
Budget Friendly Picks
- No Bangs Textured Shag Pixie, styled with a basic texture paste from Amazon
- Messy Tousled Shag Pixie, just needs dry shampoo, already in most bathroom cabinets
- Choppy Layered Shag Pixie, one sea salt spray does it all
Worth the Splurge
- Micro Bangs Shag Pixie, needs frequent trims plus a proper texture spray
- Short Shag Pixie, invest in a good volumizing dry wax from Amazon
- Color enhanced versions like a root smudge or babylights, splurge on the colorist, not the products
By Lifestyle
Busy Professionals
- No Bangs Textured Shag Pixie for that five minute polished look
- Curtain Bangs Shag Pixie, styles itself with a round brush and zero drama
Hot Humid Weather
- Short Shag Pixie, less hair means less frizz surface area
- Anti humidity spray from Amazon is non negotiable here
New Moms
- Messy Tousled Shag Pixie, dry shampoo texture is basically the whole styling routine
- Long Shaggy Pixie if you’re not ready to commit to something super short yet
Weekend Casual
- Choppy Layered Shag Pixie, embraces air dried texture beautifully
- Side Swept Bangs Shag Pixie, effortless with a little sea salt spray
Frequently Asked Questions
Will a shag pixie make my fine hair look thicker?
Yes, when it’s cut right. The short, choppy layers create lift at the root and break up the scalp shine that makes fine hair look sparse, so the illusion of density comes from the cut itself, not from your hair magically changing.
How short should a pixie be for thin hair?
I usually recommend keeping some length around the crown rather than going ultra short everywhere. A little length gives the layers something to grip onto, and going too short too fast can actually expose more scalp than you want.
Do shaggy pixies work for wavy or curly fine hair?
Absolely, and honestly it’s often even better on textured hair. The natural bend adds extra dimension and movement that straight fine hair has to fake with product, so waves and curls are a genuine bonus here, not a complication.
How often should I get my pixie trimmed?
Every four to six weeks keeps the shape intact, and closer to four weeks if you’ve got bangs or a shorter version. Skipping past six weeks is usually when clients start noticing the volume collapsing.
Is a pixie cut a good choice for thinning hair as you age?
Yes, it’s actually one of the smartest choices, since shorter layers naturally create more root lift than long hair ever could. Pair it with the right color technique like a root smudge, and it becomes one of the most age flattering, low effort cuts out there.
Conclusion
Your hair does not need to be thick to look incredible, it just needs to be cut by someone who actually understands what fine strands can do when they’re given the right shape. I’ve watched too many clients spend years fighting flat roots with the wrong products when honestly, a good pair of scissors could have solved it in one appointment. So screenshot your favorite look from this list, book that consultation you’ve been putting off, and use the exact wording we talked about so your stylist gets it right the first time. You deserve to catch your reflection and actually smile instead of sigh. Which one of these shag pixies is calling your name, drop it in the comments and let’s talk.

2 thoughts on “23 Shag Pixie Hairstyles Thin Fine Hair for a Fuller Look”