
Dutch braid hairstyles used to feel reserved for gymnasts and Pinterest boards I’d never actually recreate. Then a client sat in my chair one rainy Tuesday with a messy hairstyle left over from a wedding and asked for a ten-minute fix. That’s when I fell for these braids: they can make a simple style look like you put in extra effort. Grab your comb, because these 23 looks are made for real hair, busy mornings, and everyday life.
My Styling Notes
I’ll never forget the bride who almost fired me over a Dutch braid crown. Fine, silky hair, gorgeous morning look, and by ceremony time the whole thing had slipped because I braided her exactly how I braid my thicker haired clients. No adjustment for texture, no grip spray, nothing. I ended up re pinning her crown in a church bathroom five minutes before she walked down the aisle, heart absolutely pounding.
That day taught me something I repeat to every client now. Your hair type changes everything about how a Dutch braid behaves, how tight you pull, and how long it actually holds. I don’t guess anymore. I ask, I test, and I adjust before a single strand gets crossed. My clients get better hair days because of it, and honestly, so do I.
23 Effortless Dutch Braid Looks Every Stylish Woman Should Master
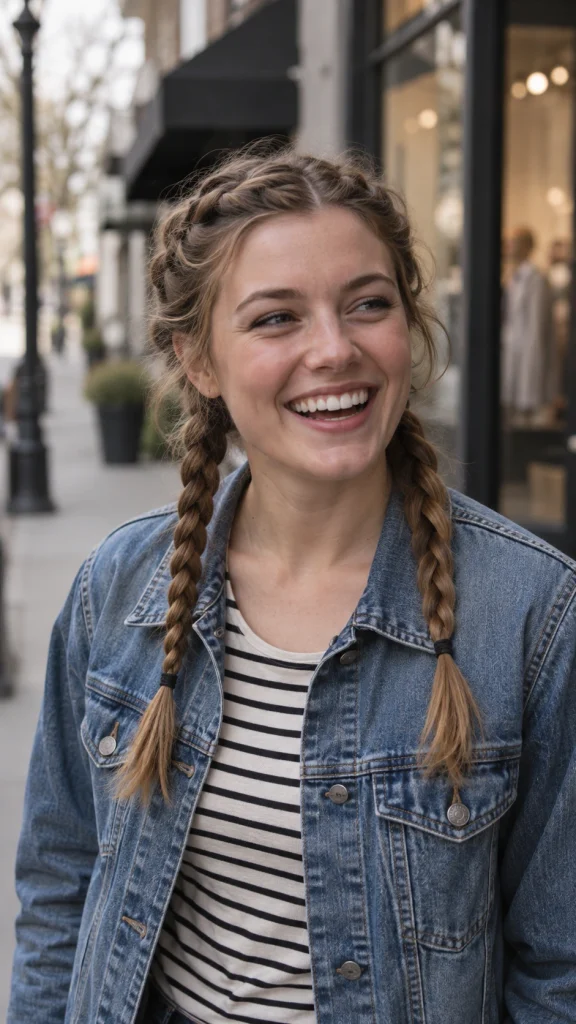
1. Double Dutch Braids

This is the one that started it all for most of us, and honestly, it never gets old. Two braids running from your hairline to the nape of your neck, each one popping slightly off the scalp instead of blending flat like a French braid does. It works for school runs, brunch, and everything in between, which is rare for a hairstyle to pull off convincingly.
One thing I always tell my clients is to part your hair with a rat tail comb before you start, not your fingers. Fingers lie to you about straightness, and a crooked middle part throws off the whole symmetry of both braids. A few things that make this style hold up better:
- Spritz a texturizing spray on dry hair before braiding for extra grip
- Keep both braids equally tight, since uneven tension is the number one giveaway they were rushed
- Tie off with clear elastics if you want the braids to look uninterrupted
2. Dutch Braid Pigtails
I mentioned my bathroom emergency with this one earlier, and I stand by it being one of the most romantic styles on this entire list. It wraps around the head like a soft halo, and it photographs beautifully from literally every angle, which brides care about more than almost anything else. If you’re looking for other romantic options for a big day, exploring mother of the bride hairstyles can give you plenty of classic updo inspiration.
The trick is proportion. If your pigtails sit too high, you’ll look like you’re auditioning for a cheerleading squad, and if they sit too low, they lose that fun, bouncy energy. Right behind the ears is usually the sweet spot.
Which one of these braids are you trying first?
3. Dutch Braid Crown
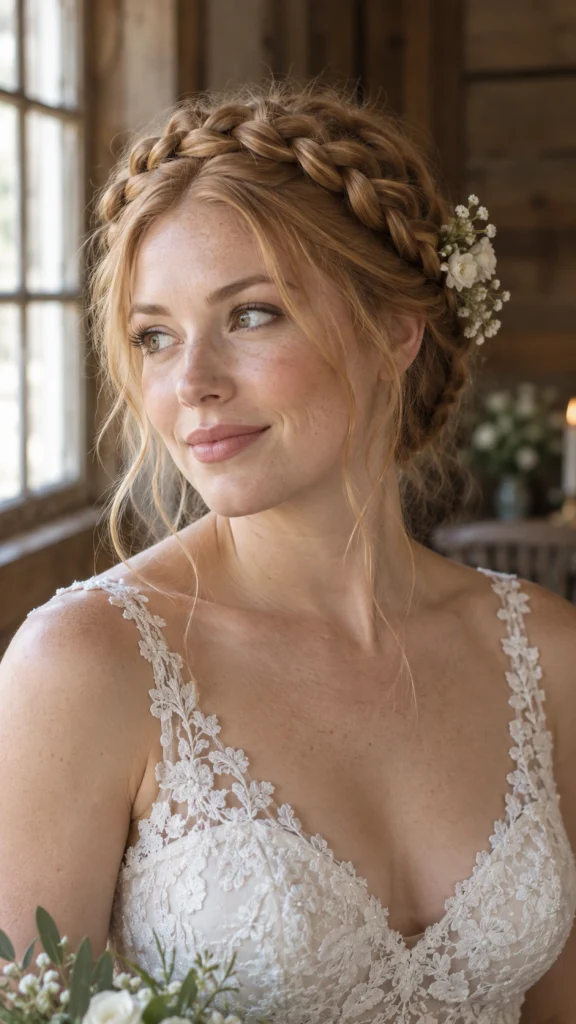
I mentioned my bathroom emergency with this one earlier, and I stand by it being one of the most romantic styles on this entire list. It wraps around the head like a soft halo, and it photographs beautifully from literally every angle, which brides care about more than almost anything else.
If you’re doing this yourself, use a hand mirror to check the back before you commit to pins. My rule of thumb is to always braid slightly tighter at the crown than you think you need to, because gravity and a full day of hugging relatives will loosen it more than you expect. A loose flower tucked near the ear or a few delicate pins can turn this from pretty to genuinely showstopping without much extra effort.
4. Side Dutch Braid

There’s something effortlessly cool about a single braid draped over one shoulder, and this is the style I reach for when I want to look put together without spending twenty minutes on it. It works with almost any face shape too, which isn’t something I can say about every braid on this list.
Keep the part deep and angled rather than centered, since that asymmetry is really what sells the whole look. A couple of loose face framing pieces left out near your temple soften it further and keep it from looking too severe for daytime wear.
5. Diagonal Dutch Braid
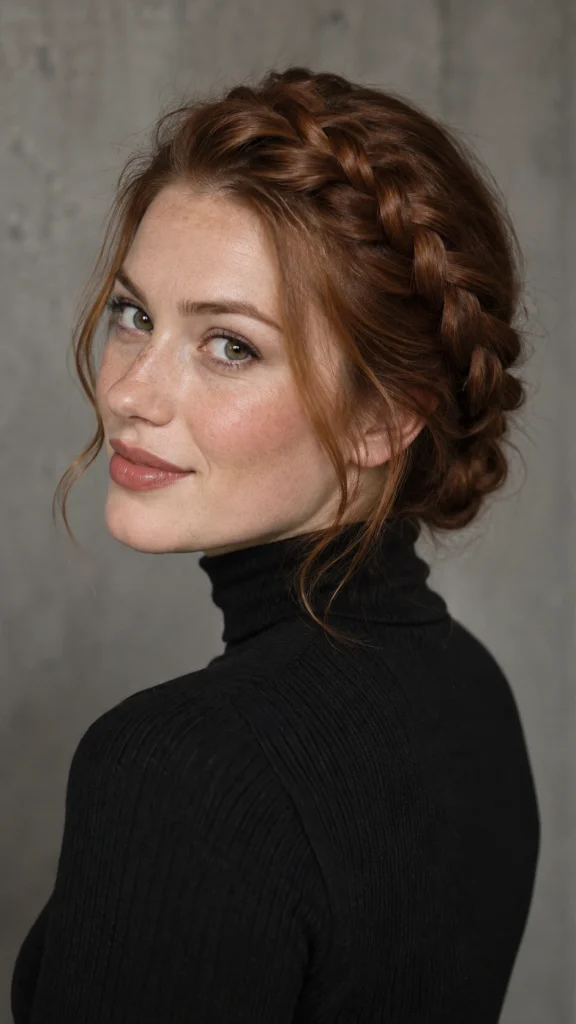
This one photographs like it took forever, but it genuinely doesn’t. Instead of starting at your hairline and going straight back, you angle the braid across your head, which creates this editorial, slightly undone energy that regular braids just can’t match. I love recommending it to clients who want something that reads as intentional and stylish without actually requiring salon level skill.
The angle is everything here. Start your part high on one side, near the temple, and let the braid travel diagonally toward the opposite ear before finishing it off as a regular braid or tucking it into a low bun. A few tips that make this one easier to nail on the first try:
- Practice the angle on damp hair first so you can see the line clearly before committing
- Don’t overthink perfection, since a slightly wavy diagonal line actually looks more natural
- Pin loose strands back if they keep crossing into the braid line
6. Half Up Dutch Braids
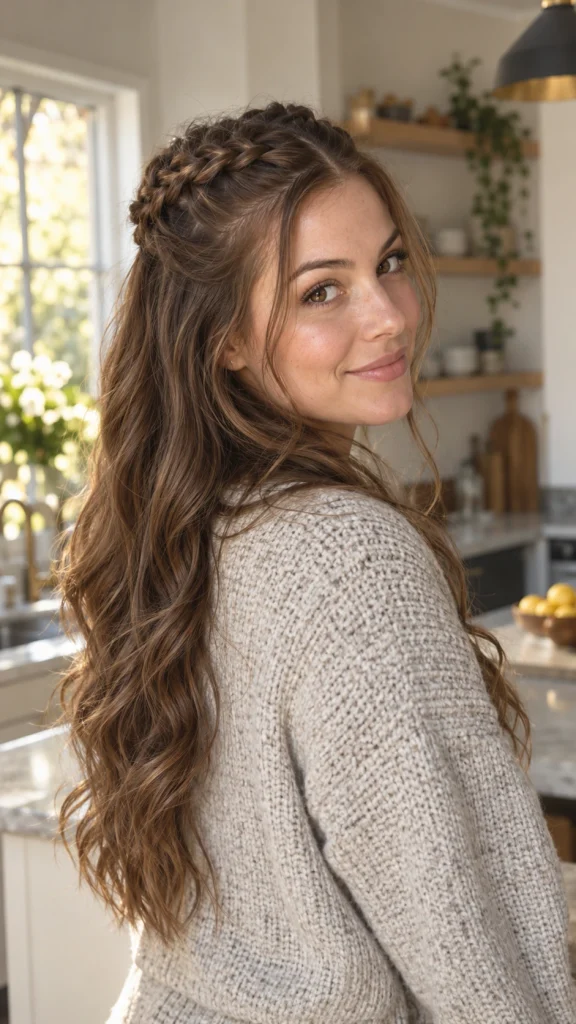
Half up styles are basically the little black dress of hairstyling. They work for almost any occasion, and this version gives you all the texture and interest of a braid while still letting your length flow free underneath. My clients who can’t commit to a full updo but still want something a little more done than a plain half up ponytail always gravitate toward this one.
I usually recommend two smaller Dutch braids meeting at the crown rather than one single braid, since it fills out that top section more and photographs fuller.
7. Dutch Braid with a High Ponytail
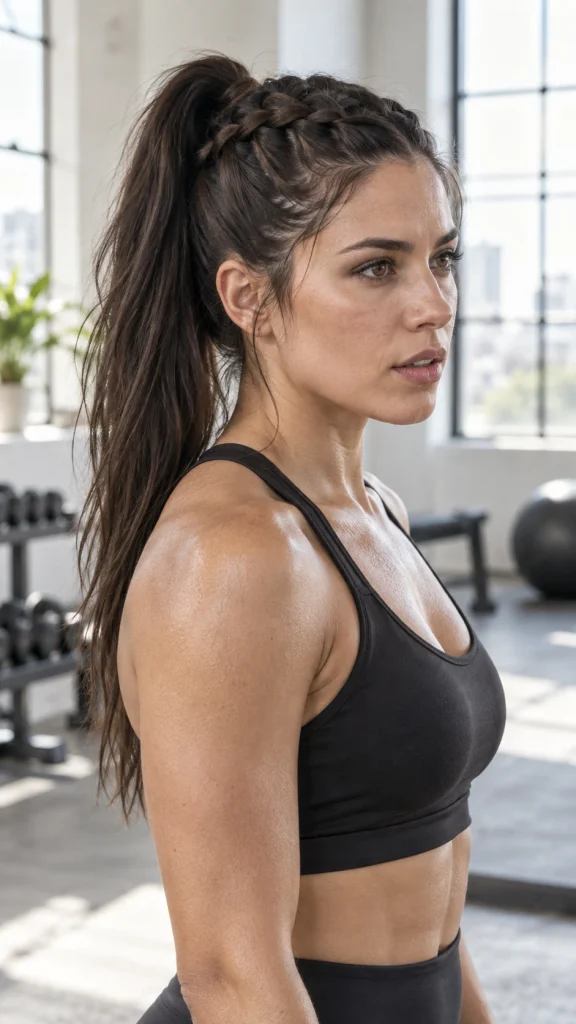
There’s a reason gymnasts and dancers have worn some version of this for decades. It’s secure, it looks sharp, and it somehow manages to feel sporty and polished at the same time. Braiding from the crown down into a high pony gives you lift at the root that a plain ponytail just can’t fake.
One thing I always tell my clients is to braid a little looser than usual right at the very top, because a pony pulled too tight at the crown creates unnecessary tension headaches by hour three. Wrap a small section of hair around your elastic to hide it, and you’ve got a look that could go from the gym straight to dinner without anyone questioning your effort level.
8. Dutch Braid with a Low Ponytail
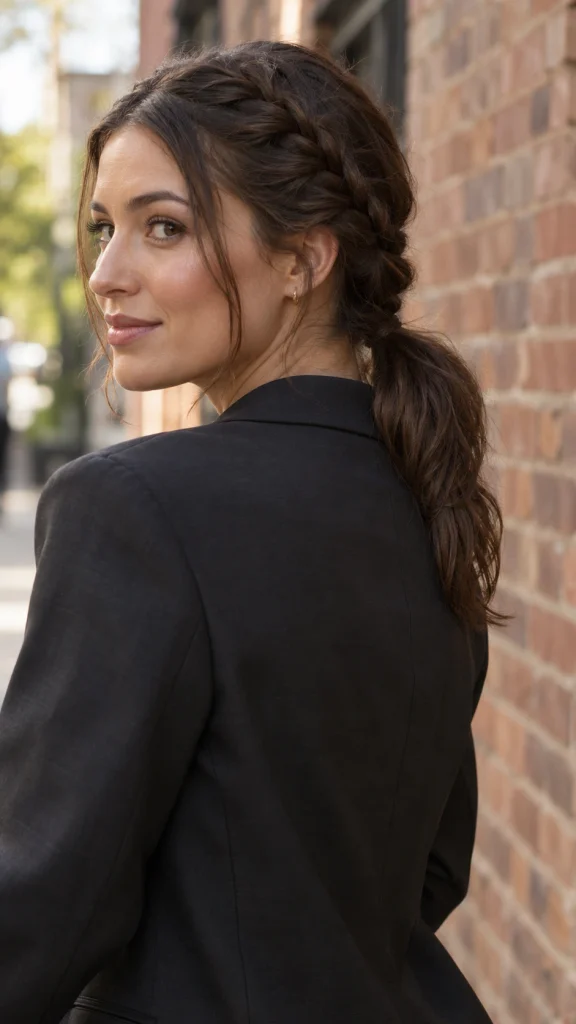
If the high ponytail version feels a little too sporty for your taste, this is the quieter, more sophisticated cousin. It sits at the nape, feels a bit more office appropriate, and honestly ages beautifully, meaning it looks just as good on a twenty five year old as it does on someone twice that age.
I like this one for humid days especially, since keeping things low and close to the head fights frizz better than anything sitting up high ever will.
9. Dutch Braid Bun

This is the style I default to when a client says “I want something that looks fancy but I have twelve minutes.” Braid it, twist it, pin it, done. The braid adds texture and dimension to what would otherwise be a pretty basic bun, and it reads as far more polished than the actual effort involved.
A few things that separate a good braided bun from a messy one:
- Braid the section fully before twisting, don’t half braid and half wrap
- Use bobby pins in an X pattern underneath the bun for real hold, not just one pin stuck in randomly
- Loosen the braid slightly with your fingers before twisting for a fuller, less severe look
10. Dutch Braided Low Bun
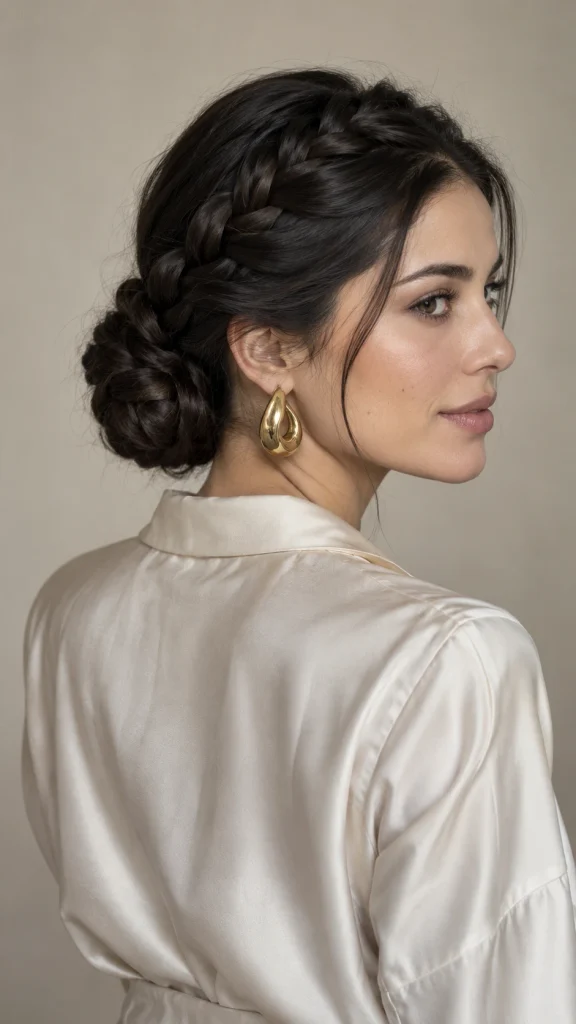
Low buns have quietly become the uniform of women who want to look expensive without trying too hard, and adding a Dutch braid into the mix only helps that cause. This version sits right at the nape, feels a little old money if I’m being honest, and pairs beautifully with statement earrings since your neck stays completely visible.
I’ve done this on brides, on job interview clients, and on myself before a flight when I refuse to deal with hair for six hours straight. It just works everywhere.
11. Dutch Braid Space Buns

I did not expect space buns to make such a strong comeback, but here we are, and adding braids into the mix genuinely elevates them past their Y2K roots. Instead of just twisting hair into two buns, you braid each side down before securing, which gives the whole style way more texture and keeps flyaways under control.
This one is playful by nature, so don’t overthink precision. A slightly uneven part or buns that aren’t perfectly symmetrical actually add to the charm rather than ruin it.
12. Dutch Braid into a Messy Bun
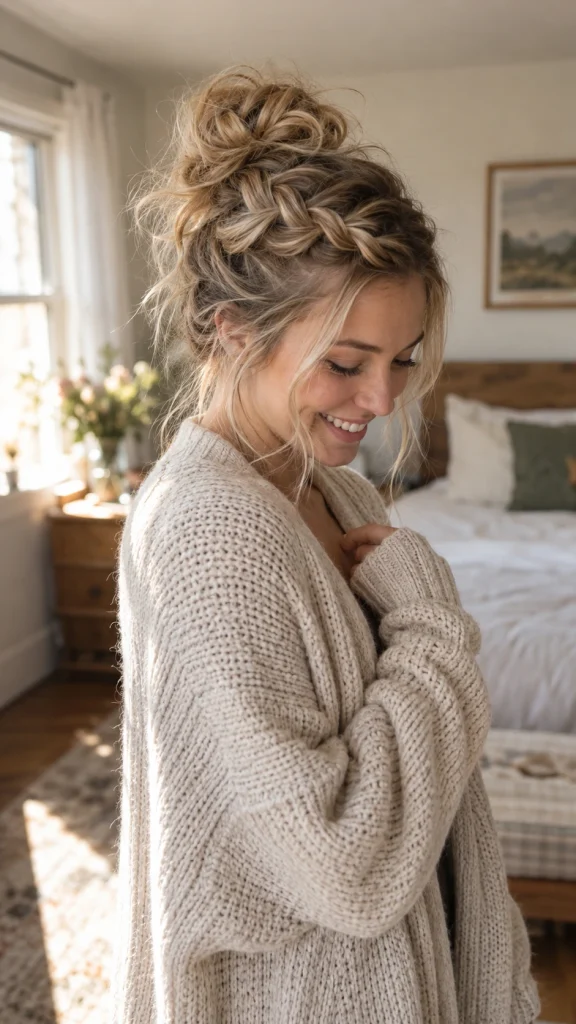
My personal go to on days when my hair has other plans. You braid loosely, let some pieces slip out on purpose, then twist the whole thing into a bun that looks like you just casually threw it together in thirty seconds, even though there’s actual technique happening underneath.
One thing I always tell my clients is that “messy” doesn’t mean sloppy. There’s still a shape to protect, and pulling a few strategic pieces loose around your face makes way more difference than yanking randomly at the whole braid.
13. Four Dutch Braids
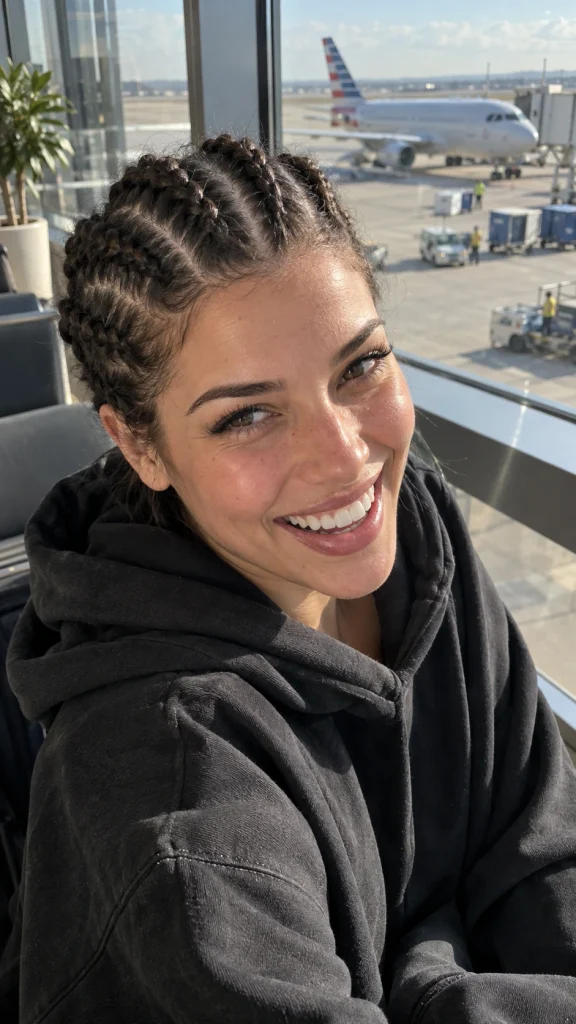
This is the style I recommend most for travel days, festival weekends, or anytime you know you won’t be near a mirror for hours. Four braids instead of two means less bulk per braid, which somehow makes the whole thing last longer and hold up better against wind, sweat, and general chaos.
Sectioning evenly matters more here than in almost any other style on this list. Uneven sections mean uneven braids, and that unevenness gets more obvious the more braids you add. A rat tail comb and a little patience at the start saves you from redoing the whole thing halfway through.
14. Dutch Braid Headband
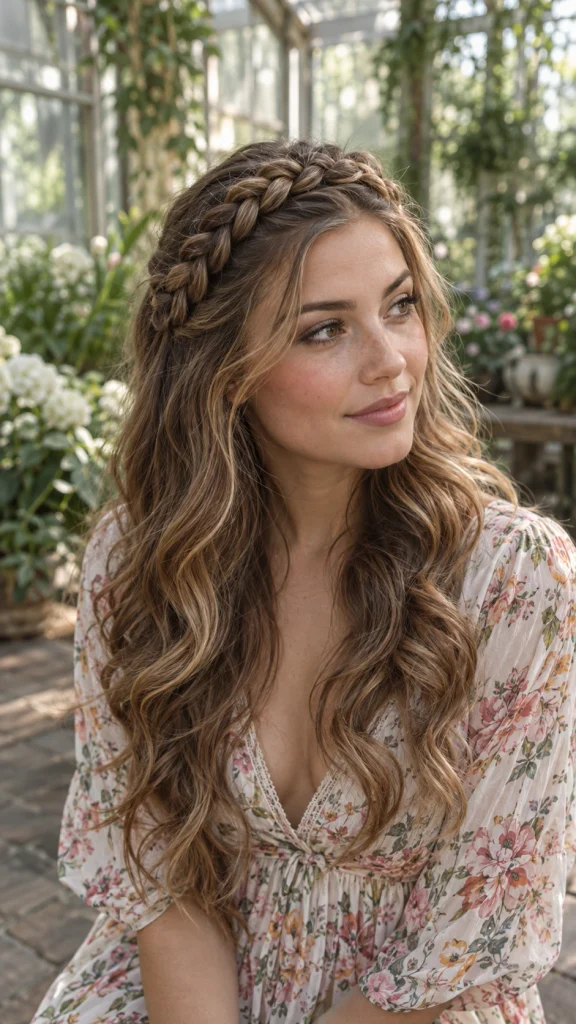
I love this one for clients who want their hair completely off their face without committing to a full updo. You braid a section from temple to temple, then let the rest of your hair fall loose underneath, and it ends up looking like a woven headband made entirely out of your own hair.
A few things I’ve learned make this look intentional rather than accidental:
- Keep the braid close to your hairline, not further back on the crown
- Pin the end securely behind your ear where it’s hidden in your loose hair
- Curl the rest of your hair afterward for contrast between the sleek braid and soft waves underneath
15. Front Dutch Braid

Sometimes you don’t need two braids, or four, or a whole updo. You just need one braid sweeping across the front of your head to keep hair out of your face while everything else stays down and effortless. This is the style I wear on days I genuinely have zero time but still want to look like I put in some thought.
It’s forgiving too, since a slightly imperfect braid barely shows once it blends into the rest of your loose hair.
16. Dutch Braid with Loose Curls
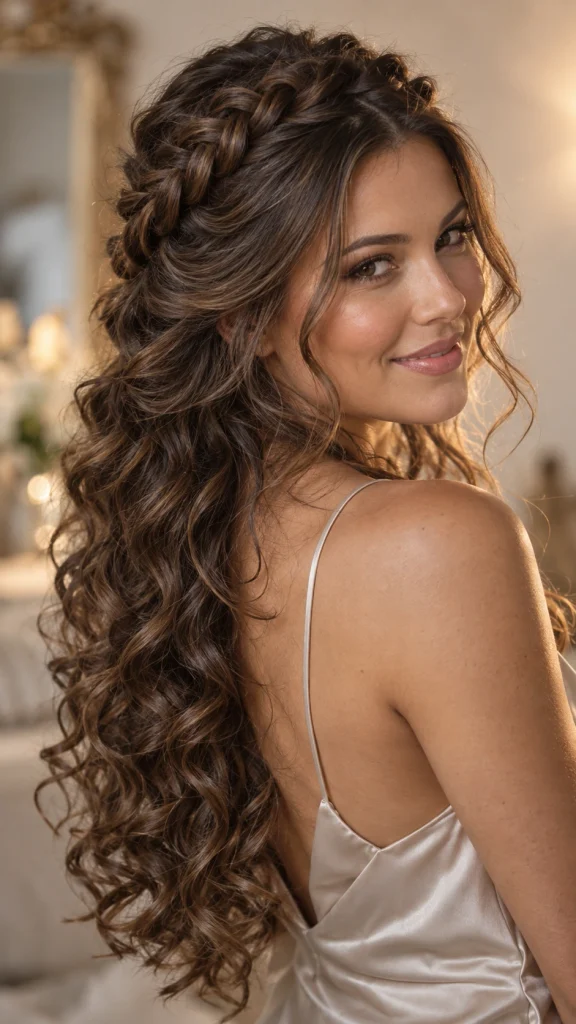
This combination is genuinely one of my favorites to create for special occasions. You braid one or two sections, usually starting near the crown, then let the rest cascade down in soft curls. The structured braid against the loose, romantic waves creates this contrast that looks effortlessly glamorous, like you woke up already done.
My honest advice is to curl your hair first, then braid, rather than the other way around. Braiding into already curled hair keeps the texture intact and stops the braid from flattening out all that volume you just spent time creating.
What’s your hair honestly begging you to try differently this week?
17. Dutch Braid with Bangs
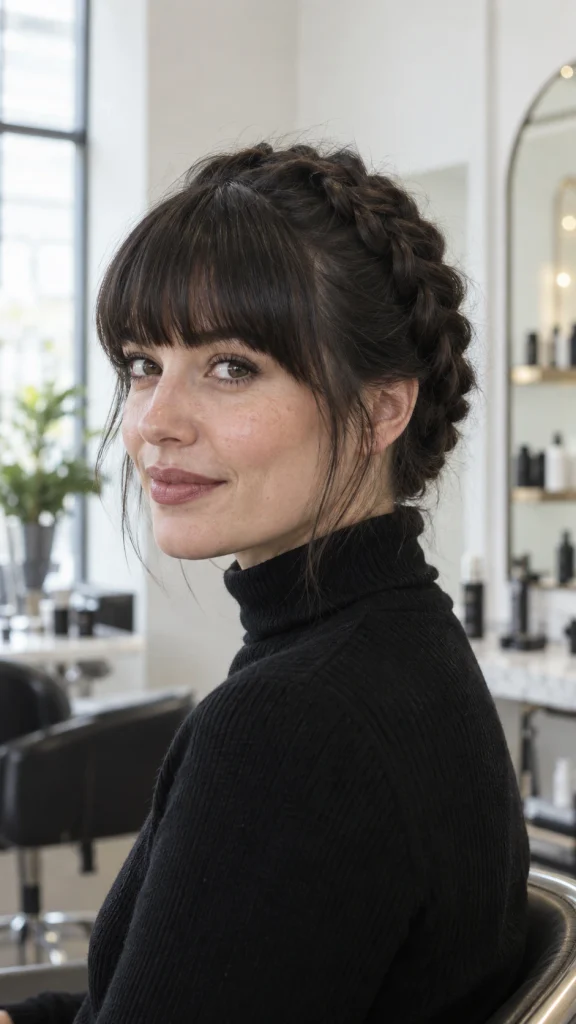
Bangs and braids can be a tricky combination, since a lot of styles end up pulling your bangs back in a way that just looks awkward instead of intentional. This version solves that by starting the braid slightly behind your bang line, so your fringe stays free to frame your face while the rest of your hair gets braided back.
I always tell clients with bangs to blow dry them into place first, before touching the braid at all, because trying to fix your bangs after the braid is already done is a losing battle. A little dry shampoo at the root also keeps them from looking flat next to all that braided texture.
18. Dutch Braids with Extensions
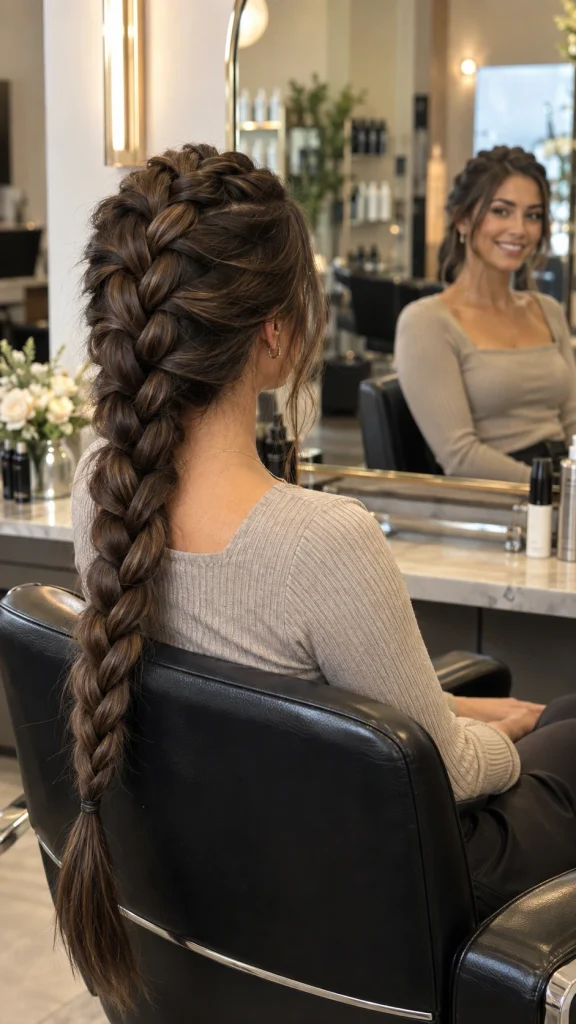
Sometimes your natural hair just isn’t cooperating with the fullness you’re picturing in your head, and that’s exactly where extensions come in. Clip in wefts or feed in extensions can transform a thin, sad little braid into something thick and dramatic, the kind you see all over Pinterest and assume is impossible with your own hair.
A quick trick I’ve learned is to match your extensions slightly lighter than your natural color rather than exactly matching, since braided hair tends to look a shade darker once it’s compressed together. It’s a small detail, but it’s the difference between extensions that blend and extensions that announce themselves.
19. Dutch Braids for Short Hair

I hear this constantly in the chair, “I don’t have enough hair for that,” and I love proving people wrong. Short hair, even a bob, can absolutely hold a Dutch braid, you just need to adjust your expectations slightly. The braid will likely be smaller and won’t reach as far down, but it still adds that same dimensional, lived in texture.
A few adjustments that make a real difference on shorter lengths:
- Use small sectioning clips to keep loose ends from sneaking into your braid
- Finish with a bobby pin instead of an elastic if your ends are too short to tie off
- Don’t force the braid past your natural length, let it dissolve into loose hair gracefully instead
20. Dutch Braids for Curly Hair
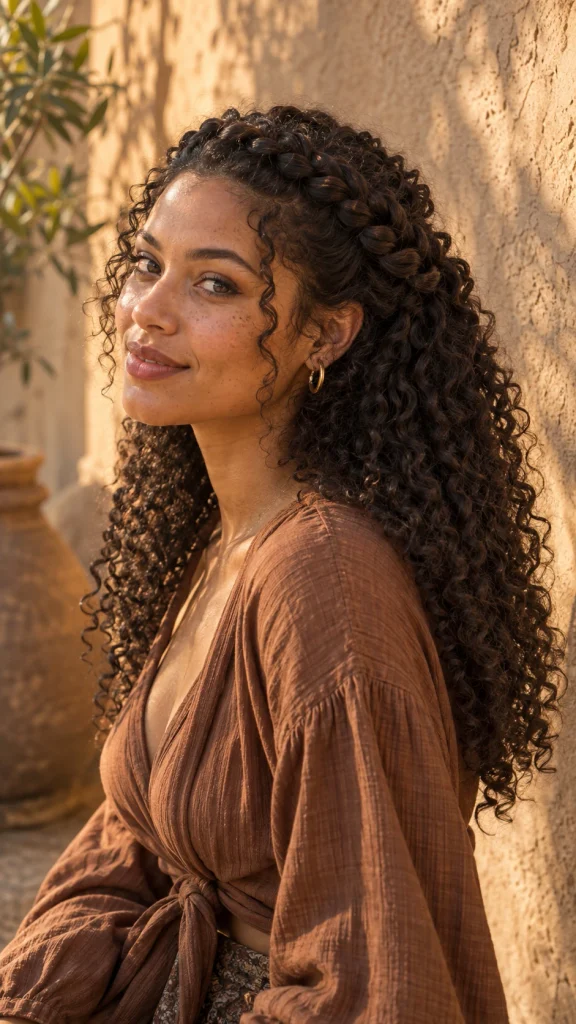
Curly hair and Dutch braids were made for each other, honestly, even though curly haired clients often assume braiding will just make their hair frizz out of control. The truth is curls actually hide small imperfections in your braiding technique better than straight hair does, since the natural texture blends everything together.
My biggest piece of advice here is to braid on damp, product coated hair rather than fully dry curls. A leave in conditioner or curl cream gives you enough grip to control the braid without disrupting your natural curl pattern once it dries.
21. Dutch Braids for Thin or Fine Hair
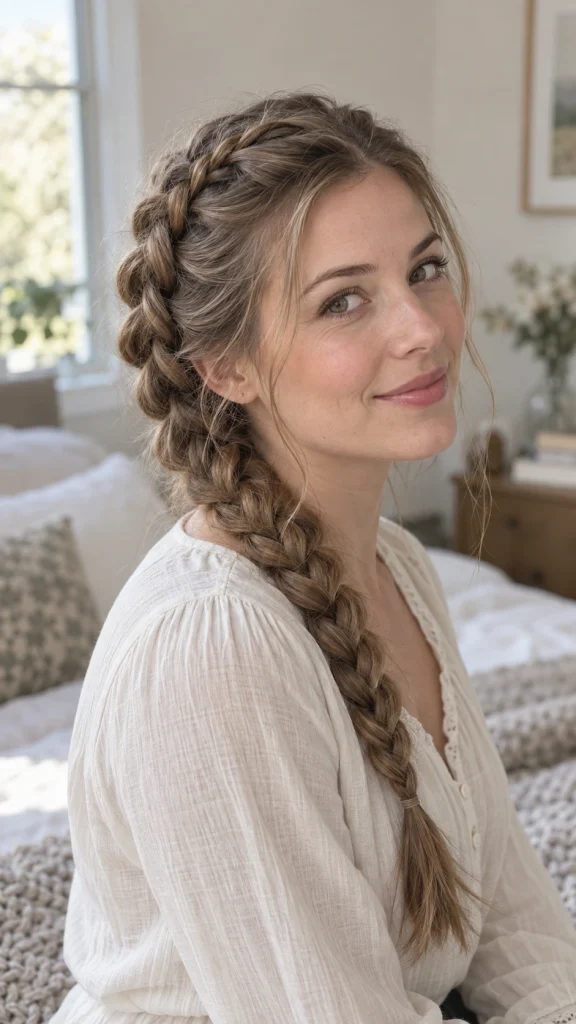
This is basically the hair type that inspired my whole “check the texture before you braid” rule after that wedding disaster I told you about earlier. Fine hair holds a Dutch braid just fine, but it needs a completely different approach than thick hair does, otherwise you end up with a braid that looks stringy and falls apart within a couple of hours. If your hair is on the fine side, you might also want to look into structural cuts and updos for fine thin hair to build instant body before styling.
A texturizing spray or dry shampoo applied before you even start braiding gives fine strands something to grip onto, since silky hair on its own tends to just slide right out of position. I also braid noticeably tighter on fine haired clients than I would on someone with thick hair, and I always pancake the braid gently afterward, pulling the edges outward just slightly to fake some volume that isn’t naturally there.
22. Dutch Braid Wedding Hairstyle
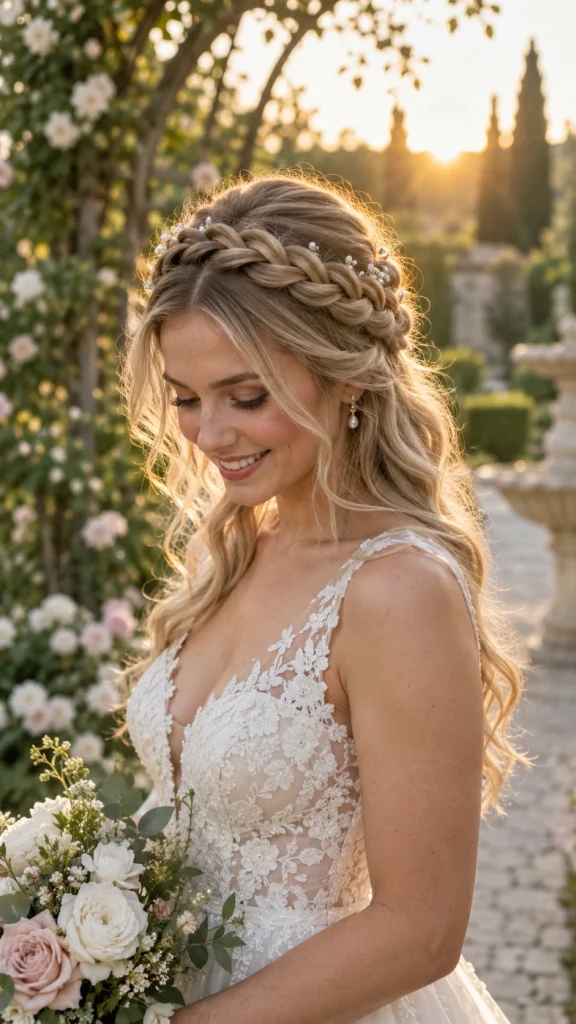
Weddings are where Dutch braids really get to show off, whether it’s a full crown, two braids swept into a low bun, or a single braid woven through an otherwise loose, romantic style. What makes braids so popular for bridal hair isn’t just how they look in photos, it’s how long they actually last through a full day of hugging, dancing, and crying happy tears.
If I’m styling a bride, I always do a trial run weeks in advance, not the week of. Hair behaves differently under stress and unfamiliar products, and the last thing anyone needs is a surprise on the actual day. Adding small details like pearls, delicate pins, or a few loose curls around the braid takes it from pretty to genuinely bridal without overcomplicating the whole thing.
Which of these styles actually fits your budget and everyday routine best?
23. Dutch Braid Workout Hairstyle

And we’re closing out with the style that honestly convinced me Dutch braids deserve way more credit than they get. This is the one built for function first, whether you’re lifting, running, or just trying to survive a summer spin class without hair stuck to your face by minute ten.
Two tight Dutch braids sitting close to the scalp will outlast almost any other style through sweat, movement, and multiple wardrobe changes. The key is tension, tighter than you’d wear on a regular day, since a loose braid at the gym just means a half undone braid by the time you’re done. Secure with a small hair tie at the nape too, not just at the ends, so nothing bounces loose mid workout.
Top 6 Products For Dutch Braid Hairstyles
| Look / Item | Estimated Price | Care Level | Where to Buy |
|---|---|---|---|
| Rat Tail Sectioning Comb | Under 10 dollars | Low | Search “rat tail comb” on Amazon |
| Texturizing Spray for Grip | 12 to 20 dollars | Low | Search “texturizing spray” on Amazon |
| Clear Silicone Elastics | Under 8 dollars | Low | Search “clear hair elastics” on Amazon |
| Clip In Extensions for Fuller Braids | 30 to 90 dollars | Medium | Search “clip in hair extensions” on Amazon |
| Edge Control or Smoothing Gel | 8 to 15 dollars | Low | Search “edge control gel” on Amazon |
| Silk Braid Friendly Sleep Bonnet | 15 to 25 dollars | Medium | Search “silk sleep bonnet” on Amazon |
Your 60 Second Braid Picker
By Budget
Budget Friendly Picks
- A rat tail comb and clear elastics, both under 10 dollars on Amazon
- Dry shampoo doubles as a texturizer, no need for a separate product
- Practice on your own hair before ever touching extensions
Worth the Splurge
- Clip in extensions for fuller, thicker braids on special occasions
- A good silk bonnet to protect braids overnight and stretch them to day three
- Professional braiding at a salon for weddings or events you can’t redo yourself
By Lifestyle
Busy Professionals
- Dutch braid bun or low bun, both take under ten minutes
- Low ponytail version fights frizz through long meetings
Hot Weather Styling
- Four Dutch braids or space buns to keep hair off your neck
- Keep braids low and tight, avoid anything sitting high and exposed to sun
New Moms
- Messy bun braid combo, forgiving if you get interrupted mid style
- Headband braid keeps hair back during those one handed mornings
Weekend Casual
- Loose curls with a single braid for that effortless look
- Front Dutch braid, quick enough to do in the car mirror
Frequently Asked Questions
How long do Dutch braids last?
I usually tell clients to expect three to five days on average, sometimes up to a week if your hair is thicker and you sleep with a silk bonnet. Fine hair tends to loosen faster, closer to two or three days.
Can I Dutch braid my own hair by myself?
Yes, but it takes practice, especially for the back sections you can’t fully see. Start with a front braid or side braid first, since those are much easier to manage solo before attempting anything at the back of your head.
Do Dutch braids damage your hair?
Not if you’re doing them correctly and not leaving them in for too long. The real damage usually comes from braiding too tight near the hairline or skipping moisture before braiding curly or dry hair.
What’s the difference between a Dutch braid and a French braid?
The best way to remember it is that Dutch braids sit on top and French braids blend in. Technically, a Dutch braid crosses strands under each other while a classic French braid crosses them over, which is what creates that raised, three dimensional look.
Can Dutch braids work on short hair or a bob?
Absolutely, you just need to adjust your expectations on length and fullness. Shorter hair usually means a smaller braid that blends into loose ends rather than reaching all the way down, but the texture still looks great.
Conclusion
Here’s the thing about braids nobody tells you when you start out. You don’t need perfect hands or a professional kit to feel put together, you just need to pick one style from this list and actually try it this week. Grab that rat tail comb, mess it up a little the first time, and try again, because even a slightly crooked Dutch braid still beats a rushed, undone bun on a busy morning. Your hair doesn’t need to be flawless to make you feel like you’ve got it together. So tell me, which one are you trying first, the crown, the space buns, or are you finally attempting to braid your own hair in the mirror this weekend?

1 thought on “23 Dutch Braid Hairstyles To Copy Right Away”